
microPro 300
Quick Start Guide
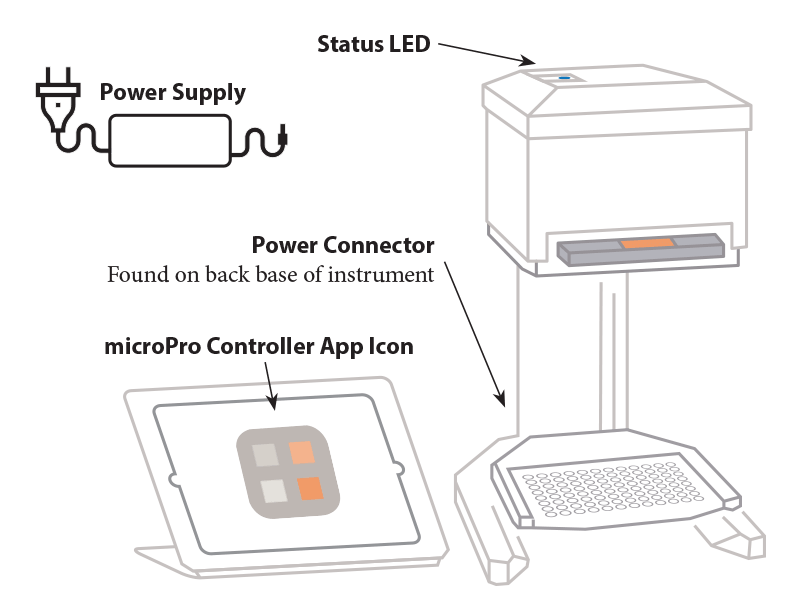
Step 1.
1A. Unpack and connect Power Supply to the microPro 300 Power Connector.
1B. Plug the microPro 300 into a power outlet.
1C. Launch microPro Controller App on the iPad. The App will search for and auto-discover nearby microPro 300 instruments.
CAUTION: When removing the instrument, the head will be free to move once removed from the protective foam.
Step 2.
2A. Verify the bluetooth connection between the microPro 300 and the iPad (The Status LED on top of the microPro will turn from red to blue).
Blue - Instrument is on, and connected to a tablet
Red - Instrument is on, but NOT connected to a tablet
Flashing Red - Instrument is on, NOT connected to a tablet, and has gone into Power Save Mode
2B. When prompted, press the Run Button to Home and initialize the instrument. This will take 10-15 seconds.

Step 3.
3A. Press the Eject Button to remove the Shipping Cartridge from the Instrument Head.
3B. Place a rack of tips with the cover removed on the Nest.
3C. Slide the Instrument Head to the top of the tips, and apply 2 pounds of force downward for 2 seconds.
3D. Raise the Instrument Head up. The tips are now securely installed.

Congratulations!
You are now ready to use your microPro 300 with preconfigured pipette routines, or you can begin to program your own routines by using the Custom Tab.